How to Choose the Best Home Water Test Kit?
Choosing the best home water test begins with a practical question: what risk are you trying to measure? A cloudy glass, metallic taste, or old plumbing can suggest problems, but appearance cannot identify lead, bacteria, nitrates, or volatile chemicals.
The World Health Organization’s 2022 Joint Monitoring Programme reported that 2.2 billion people lacked safely managed drinking water in 2022. This global figure shows why reliable testing matters, even when tap water looks clean. In the United States, the Centers for Disease Control and Prevention estimates that more than 43 million people use private wells. These households often carry greater responsibility for routine monitoring. The U.S. Environmental Protection Agency recommends regular well testing for indicators such as coliform bacteria and nitrate, especially after flooding, repairs, or changes in taste.
A home water test can provide a useful first screening. It cannot replace laboratory confirmation for serious contamination. A color strip may change within seconds. That feels reassuring, but the result may depend on lighting, storage, timing, and user technique. This is easy to underestimate.
Look for clear detection limits, expiration dates, third-party validation, and instructions matching your water source. Certifications connected with NSF standards can also support more informed comparisons, although certification does not mean every contaminant is covered. For uncertain results, use a state-certified or otherwise accredited laboratory. Testing the kitchen tap may reveal different conditions than testing the outdoor spigot. The strongest choice is not always the cheapest kit. It is the one that matches your suspected risks, reporting needs, and follow-up options.
Define the Test Goal: EPA Regulates More Than 90 Drinking-Water Contaminants
Before buying a home water test kit, define the problem you want to investigate.
The U.S. Environmental Protection Agency regulates more than 90 drinking-water contaminants under federal standards. However, one kit rarely measures all of them. A private well, an aging building, and municipal water require different testing priorities.
Start with your water source and local risk profile. EPA consumer guidance identifies lead, arsenic, nitrate, bacteria, and disinfection byproducts as important concerns.
In a 2023 study, the U.S. Geological Survey detected at least one PFAS compound in about 45% of sampled U.S. tap-water supplies. That statistic is not a prediction for every household. It does show why regional information matters.
Check your annual water-quality report, then compare its listed contaminants with the kit’s analyte list, detection limits, and testing method.
Some kits provide useful screening evidence. Others offer impressive-looking numbers that are difficult to interpret. I have found that unclear sampling instructions can undermine an otherwise accurate test.
Follow the timing, flushing, container, and storage requirements exactly. For suspected lead, collect first-draw water from the tap used for drinking. For bacteria, delays between collection and laboratory delivery may affect results.
Home tests should guide decisions, not replace certified laboratory analysis. When results conflict with official reports, repeat the test and investigate the method.
A cheaper kit may be reasonable for a preliminary check, but it may be a poor choice for a high-risk contaminant.
Match Analytes to Risks: Compare Lead at 15 ppb and Nitrate at 10 mg/L
How to Choose the Best Home Water Test Kit?
Choose a kit around your actual risks, not its number of test strips. Lead and nitrate require different testing priorities. The U.S. Environmental Protection Agency sets a lead action level of 15 parts per billion (ppb) under its Lead and Copper Rule. This is a regulatory trigger, not proof that lower levels are harmless. Lead can enter water through old service lines, solder, or plumbing fixtures after water sits overnight.
Nitrate needs a separate lens. The EPA maximum contaminant level is 10 milligrams per liter, measured as nitrogen. The World Health Organization lists 50 milligrams per liter as nitrate ion, so units matter. Confusing “nitrate as nitrogen” with “nitrate” can produce a misleading result. High nitrate is especially concerning for infants using prepared formula. Test after heavy rain or fertilizer use if your home relies on a private well.
Read the method carefully.
For lead, select a kit with low-ppb sensitivity and clear first-draw instructions. A clean-looking sample proves little. For nitrate, choose a quantitative test with a range near 10 mg/L as nitrogen, rather than a broad color strip. Collecting water incorrectly is easy. I have found that flushing time, bottle cleanliness, and lighting can change how a result appears. Treat home kits as screening tools, then confirm a concerning result through an accredited laboratory. Sources: U.S. EPA, Lead and Copper Rule; U.S. EPA, National Primary Drinking Water Regulations; World Health Organization, Guidelines for Drinking-water Quality.
How to Choose the Best Home Water Test Kit?
Match Analytes to Risks: Compare Lead at 15 ppb and Nitrate at 10 mg/L
Select a home water test kit that measures the contaminants relevant to your local risks. The chart compares two U.S. Environmental Protection Agency drinking-water benchmarks: lead at an action level of 15 µg/L, approximately 15 ppb, and nitrate at a maximum contaminant level of 10 mg/L measured as nitrogen. Because the units differ, each analyte uses its own vertical scale. Lead and nitrate should be tested with methods designed specifically for those analytes.
Reference: U.S. EPA National Primary Drinking Water Regulations. Lead: 15 µg/L action level. Nitrate: 10 mg/L as nitrogen maximum contaminant level.
Verify Kit Quality: Check EPA Methods, Detection Limits, and NSF Standards
How to Choose the Best Home Water Test Kit?
Verify Kit Quality: Check EPA Methods, Detection Limits, and NSF Standards
Choosing a home water test kit should begin with evidence, not colorful packaging. Check whether the instructions identify an EPA method or another recognized analytical procedure. The method should match the contaminant and water type. A procedure designed for treated water may not suit a private well. That distinction is easy to miss. Ask whether the method was adapted for home use. Adaptations can change accuracy, especially when colors are judged by eye. A clear method number is useful, but it is not proof of performance.
Study the detection limit before buying. It should be lower than the health threshold or regulatory level relevant to your water. A result below the detection limit does not mean the contaminant is absent. It means the test could not measure it at that level. Look for precision data, recovery studies, and independent validation. Check the reporting units too. Micrograms per liter and milligrams per liter differ greatly. I once treated a “high sensitivity” claim as decisive, but the reporting range was too broad for meaningful comparison. That was a useful correction.
NSF standards and certification can add confidence, but scope matters. Confirm the exact standard, product type, and contaminant claim. Certification for a filter does not automatically certify a water test kit. Look for a current certificate, test conditions, and certification body details. Also inspect expiration dates, sealed reagents, sample containers, and storage instructions. Keep photos of color results and record collection time. If the result seems unusual, repeat the test or use an accredited laboratory. Home kits are practical screening tools. They are not perfect.
Choose the Sampling Format: Strips, Drop Tests, or Laboratory Mail-In Kits
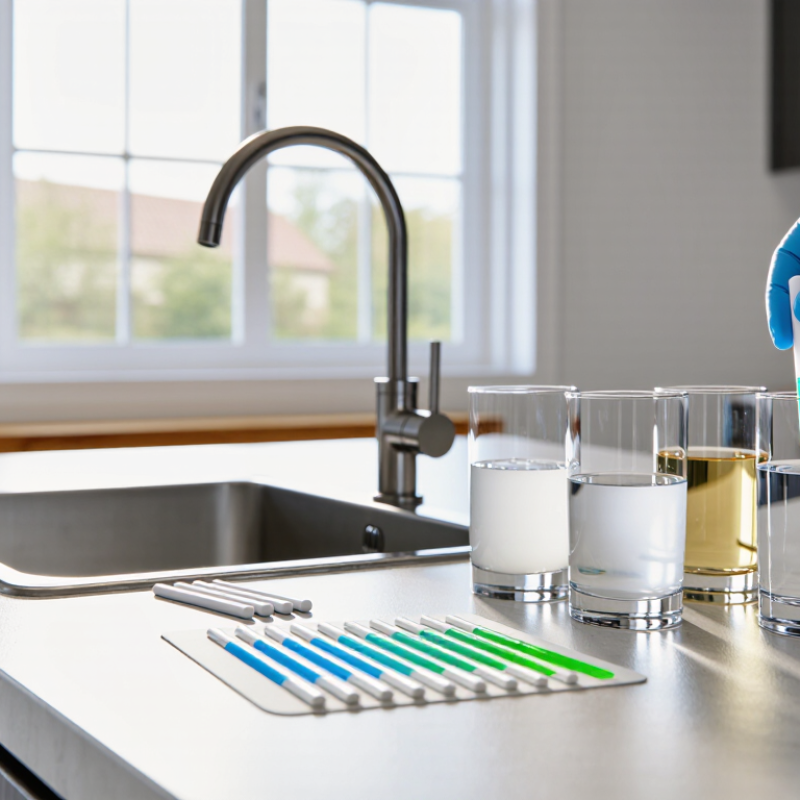
Choosing the right home water test kit starts with the sampling format. Test strips are quick, affordable, and simple for checking chlorine, hardness, pH, or nitrate. Dip the strip into a clean sample, wait for the stated time, and compare its colors under good lighting. However, color charts can be difficult to read. My first reading was not as clear as expected.
Drop tests usually offer better control. You add measured drops to a water sample, then observe a color change. This method can provide more precise results for hardness, chlorine, or acidity. It also demands careful technique. An extra drop, a dirty container, or an incorrect waiting time may affect the result. Follow the instructions exactly, and record the date, source, and result.
Tips: Use a clean glass container, not a reused bottle with detergent residue. Test cold tap water after running it briefly. For metals or unusual results, choose a laboratory mail-in kit. Laboratories can use validated methods and provide numerical results, detection limits, and professional interpretation. Check whether the laboratory follows recognized quality standards. Mail-in testing takes longer, but it may be more dependable when a small color difference matters. Retesting is sensible, especially when results conflict with taste, odor, or visible changes.
Interpret Results: Retest Yearly and Confirm Problems with an Accredited Lab
A home water test kit is a useful screening tool, not a final verdict.
Read the result beside its detection limit, units, sample date, and storage instructions. A color change near the chart boundary deserves caution. The Centers for Disease Control and Prevention recommends annual testing for private wells, especially for total coliform bacteria and nitrate. Retest sooner after flooding, repairs, unusual taste, or a change in household health.
Interpret numbers against the correct standard, not against appearance. The World Health Organization’s Guidelines for Drinking-water Quality lists 10 µg/L for arsenic and 50 mg/L for nitrate. These values are reference points, not permission to ignore local requirements.
A negative strip does not prove safety when the contaminant falls outside its design. That is the uncomfortable part. Many kits cannot identify contamination sources or measure changing concentrations reliably.
When a result is positive, borderline, or surprising, collect a fresh sample for an accredited laboratory.
Choose a laboratory recognized under a national accreditation program, such as ISO/IEC 17025. Ask for chain-of-custody instructions, preservation requirements, and the laboratory’s reporting limit. Keep photos, dates, lot numbers, and weather notes. They make patterns easier to evaluate. If the laboratory disagrees with the kit, do not simply choose the lower number. Review the sampling technique and repeat testing. The first result may be wrong. The second may expose a real problem.